Deep Learning with Neural Networks

Deep Learning with Neural Networks: Unlocking Complex Patterns
Deep Learning, a subset of machine learning, leverages neural networks with multiple layers to model complex patterns in data. From image recognition to natural language processing, deep learning powers cutting-edge AI applications. In this blog, we’ll explore the fundamentals of deep learning, neural network architecture, and a practical example of building a neural network using Python and TensorFlow.
What is Deep Learning?
Deep Learning uses neural networks with many layers (hence "deep") to learn hierarchical feature representations from raw data. Unlike traditional machine learning, which relies heavily on feature engineering, deep learning automatically extracts relevant features, making it ideal for tasks like computer vision and speech recognition.
Key characteristics:
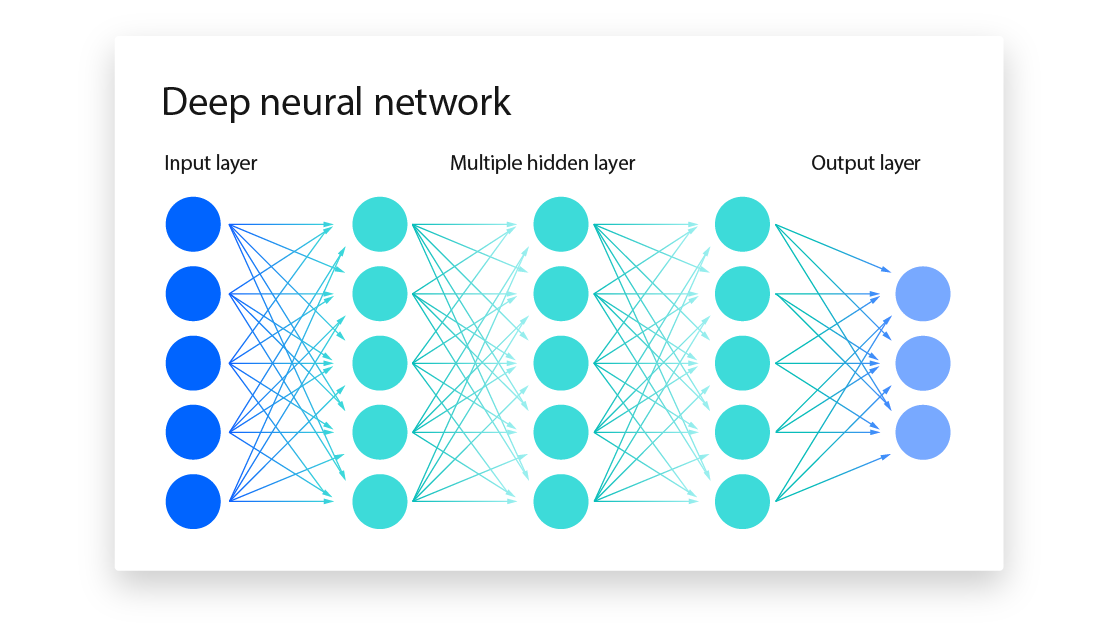
- Layered Architecture: Comprises input, hidden, and output layers.
- Non-linear Transformations: Uses activation functions to model complex relationships.
- Scalability: Performs better with large datasets and computational power.
Neural Network Basics
- Neuron: A computational unit that processes input, applies weights, adds bias, and passes the result through an activation function (e.g., ReLU, sigmoid).
- Layers:
- Input Layer: Receives raw data.
- Hidden Layers: Extract features through transformations.
- Output Layer: Produces final predictions.
- Backpropagation: Optimizes weights by minimizing a loss function using gradient descent.
- Loss Function: Measures prediction error (e.g., mean squared error for regression, cross-entropy for classification).
- Optimizer: Adjusts weights to minimize loss (e.g., Adam, SGD).
Common Deep Learning Architectures
- Feedforward Neural Networks: Basic architecture for general tasks.
- Convolutional Neural Networks (CNNs): Excel in image processing.
- Recurrent Neural Networks (RNNs): Handle sequential data like time series or text.
- Transformers: Power modern NLP models like BERT and GPT.
Building a Neural Network with TensorFlow
Let’s create a simple neural network to classify handwritten digits using the MNIST dataset, a classic deep learning benchmark.
Step 1: Set Up the Environment
Install Python and required libraries:
pip install tensorflow numpy matplotlib
Step 2: Write the Deep Learning Code
Create a file named mnist_classifier.py with the following code:
import tensorflow as tf
from tensorflow.keras import layers, models
import numpy as np
import matplotlib.pyplot as plt

# Load and preprocess the MNIST dataset
(x_train, y_train), (x_test, y_test) = tf.keras.datasets.mnist.load_data()
x_train = x_train.astype('float32') / 255.0  # Normalize pixel values
x_test = x_test.astype('float32') / 255.0
x_train = x_train.reshape(-1, 28 * 28)  # Flatten images
x_test = x_test.reshape(-1, 28 * 28)

# Build the neural network model
model = models.Sequential([
    layers.Dense(128, activation='relu', input_shape=(784,)),  # Hidden layer 1
    layers.Dense(64, activation='relu'),  # Hidden layer 2
    layers.Dense(10, activation='softmax')  # Output layer (10 digits)
])

# Compile the model
model.compile(optimizer='adam',
              loss='sparse_categorical_crossentropy',
              metrics=['accuracy'])

# Train the model
history = model.fit(x_train, y_train, epochs=5, batch_size=32, validation_split=0.2)

# Evaluate the model
test_loss, test_accuracy = model.evaluate(x_test, y_test)
print(f"\nTest Accuracy: {test_accuracy:.2f}")

# Make a prediction on a sample
sample = x_test[0].reshape(1, 784)
prediction = model.predict(sample)
predicted_digit = np.argmax(prediction)
print(f"Predicted Digit: {predicted_digit}")

# Plot training history
plt.plot(history.history['accuracy'], label='Training Accuracy')
plt.plot(history.history['val_accuracy'], label='Validation Accuracy')
plt.xlabel('Epoch')
plt.ylabel('Accuracy')
plt.legend()
plt.show()
Step 3: Run the Code
Execute the script:
python mnist_classifier.py
Expected Output:
...
Epoch 5/5
1500/1500 [==============================] - 2s 1ms/step - loss: 0.0300 - accuracy: 0.9900 - val_loss: 0.0800 - val_accuracy: 0.9750
313/313 [==============================] - 1s 1ms/step - loss: 0.0700 - accuracy: 0.9780

Test Accuracy: 0.98
Predicted Digit: 7
A plot will display training and validation accuracy over epochs.
Explanation
- Dataset: MNIST contains 60,000 training and 10,000 test images of handwritten digits (28x28 pixels).
- Model: A feedforward neural network with two hidden layers (128 and 64 neurons) and a softmax output layer for 10 classes.
- Training: The model trains for 5 epochs, optimizing cross-entropy loss with the Adam optimizer.
- Evaluation: Accuracy on the test set measures performance.
- Prediction: The model predicts the digit for a sample image.
Best Practices for Deep Learning
- Data Preprocessing: Normalize inputs and augment data to improve generalization.
- Regularization: Use dropout or L2 regularization to prevent overfitting.
- Hyperparameter Tuning: Experiment with learning rates, batch sizes, and layer sizes.
- Model Monitoring: Track metrics like loss and accuracy during training.
- Hardware Acceleration: Leverage GPUs or TPUs for faster training.
Conclusion
Deep Learning with neural networks unlocks the ability to solve complex problems by learning intricate patterns from data. The MNIST example demonstrates a basic neural network, but deep learning extends to advanced applications like autonomous driving and language translation. Start exploring TensorFlow or PyTorch to build your own intelligent systems!

Application Security Best Practices

Ethical Hacking Techniques

Data Science with Python

Backend Development with Node.js


Fullstack Development Guide

Network Security Essentials
